Anaeyes Software Installation Procedure - SL650
Software Installation

Click here to Download Anaeyes. (Version with video compressor)
Share Database between Rooms.
1) Make sure that the 2 PC for the slit lamp are on the same network
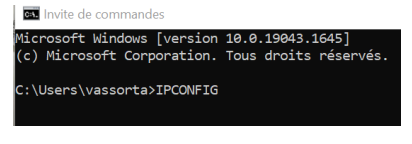
2) Obtain the IP Address of the PC1 on which the database is set up and would be the main one
Run an “ipconfig” from a command prompt:

3) Open the Anaeyes SL software on the second PC (PC2)
Click the edit icon to enter the server configuration page.
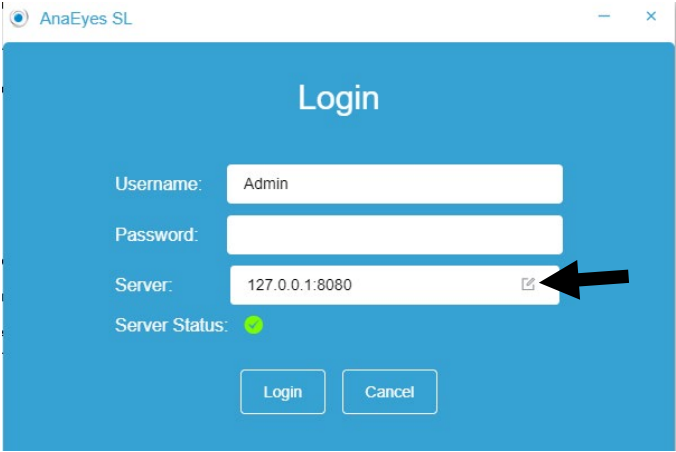
Edit the IP Server by editing the Server field.

Copy the IP address of the server PC and the port number
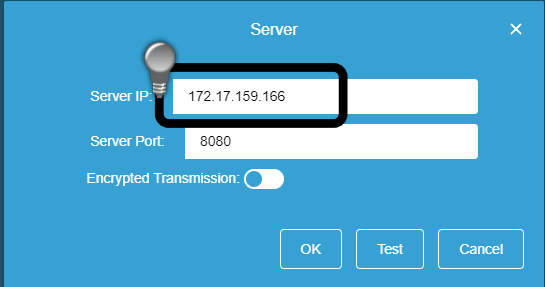
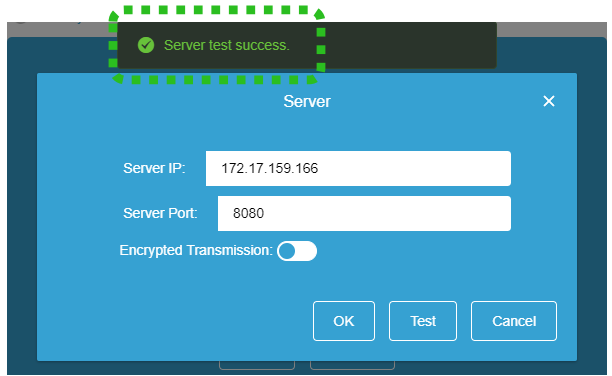
Test: press the Test button
> The server status must be green.
1) Make sure that the 2 PC for the slit lamp are on the same network
2) Obtain the IP Address of the PC1 on which the database is set up and would be the main one
Run an “ipconfig” from a command prompt:
3) Open the Anaeyes SL software on the second PC (PC2)
Click the edit icon to enter the server configuration page.
Edit the IP Server by editing the Server field.
Copy the IP address of the server PC and the port number
Test: press the Test button
> The server status must be green.
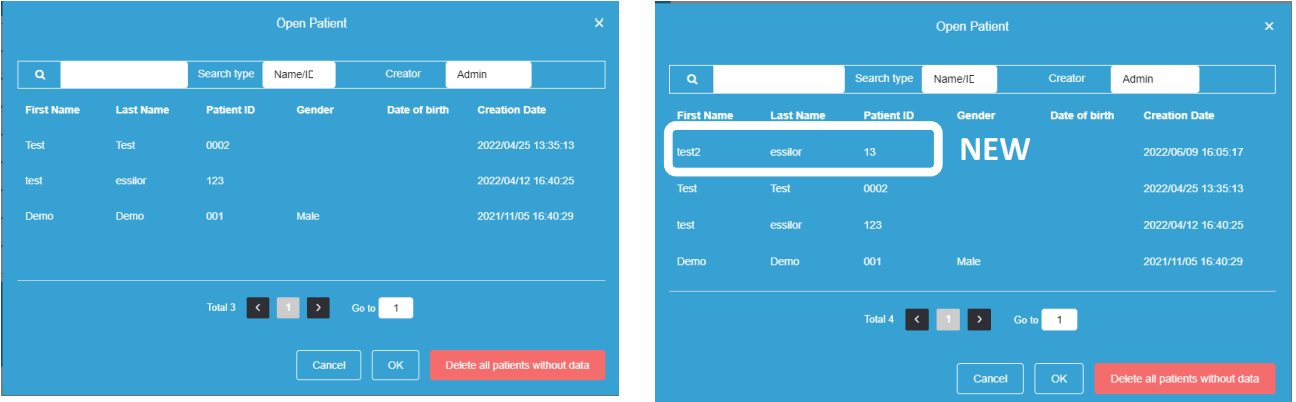
Verify Database between Rooms is shared.
1. Enter the application and open the patient list. Make sure it is the same as the Server PC.
2. Create a patient and capture an image on the server PC.
3. Check the patient list on the PC for updates.
1. Enter the application and open the patient list. Make sure it is the same as the Server PC.
2. Create a patient and capture an image on the server PC.
3. Check the patient list on the PC for updates.
Related Articles
Anaeyes - How to reinstall Software - SL650
Install drivers Go to Control Panel, then Program and Features. Find and select Anaeyes Click Uninstall. Click here to review how to remove residual files. Install Software Click here to review how to install softwareAnaeyes - How to remove residual files from software in PC - SL650
Deleting the AnaEyes_SL folder Type %appdata% in the file explorer bar. Delete AnaEyes_SL and mediview2018server After uninstall Anaeyes from the winodws PC Delete the AnaEyes_SL Folder located inside OS (C:)SL650 & SL650+ Videos Installation Procedures
Software Installation Click here to Download Anaeyes. (Version with video compressor) Chinrest and Base Digital Camera & Microscope Cables and Chin Rest DryEye Module Installation Share Database between Rooms. 1) Make sure that the 2 PC for the slit ...SL650+ Videos Installation Procedures - DryEye Suite
Software Installation Click here to Download Anaeyes. (Version with video compressor) DryEye Module Installation Share Database between Rooms. 1) Make sure that the 2 PC for the slit lamp are on the same network 2) Obtain the IP Address of the PC1 on ...SL500 & SL550 - Installation Procedure with DS550
Step 1 Locate the part ARM005 or 1040X the Installation_Pattern and TABTOP03 Step 2 Place the Installation_Pattern on the surface of the table and align it with the center. Make sure to flush the line with the edge of the table. Step 3 Use scotch ...